Alan Belcher is a top UFC competitor and is recognized as one of the best submission grapplers in America. His new “Immunity Course” is built to teach ANYONE how to beat more experience grapplers. Get in on his Free video series at: www.MicroBJJ.com/Immunity
In many MMA fights, it’s very common to see the “wall & stall” tactic in
which a fighter pins their opponent against the cage. Pressing their dead weight on to their rival, it can begin to drain their energy reserves very quickly. Likewise, this one will cause the fans to boo a bit, but that’s their problem.
Luckily, if you find yourself in this position, Alan Belcher has a sequence just for you! Let’s take a look.
Alan Belcher Cage Defense
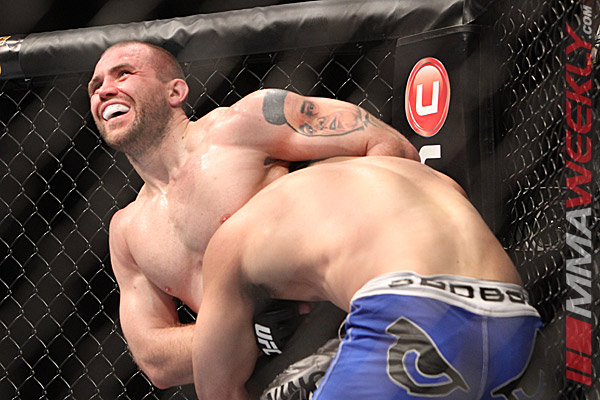
So the fight has started as you and your opponent get a feel for one another. Out of the blue, he shoots for a double but is only able to pin you against the cage. He’s pressing forward, clearly taking advantage of the fight. What should you do?
Firstly, you’ll want to cage sprawl; widening your stance and pressing down on his head. From here, go for wrist control. The stance should be awkward enough that it forces him to switch to a single leg, looking for the finish. Once he does this, press downward on the back of his head with your chest.
Your opponent should be nice and compact now, so you will want to lace your left arm through and grab their wrist. With a firm hold, lock on your kimura grip. As you squeeze your quads, leg and stomach, his head should be trapped, with no chance to escape. From here, sit out onto the mat.
Kimura Lock Defense: What to Expect
By now your opposition should be well aware of how this fight is going. Quickly, they pop up to their knees, fearing their shoulder is about to be torn off the bone. Anticipate a step over as they establish a base; counter act this by keeping your leg tight to your body.
With the move still locked in, slide off to your hip. The hold should force them to roll onto their back, which is where things get good. Smoothly transition to your back, ending in a modified crucifix position.
With the end in sight, reach over and lock on the kimura while releasing your legs. This is where things get good! At this point, your opponent is fully at your mercy and all they have left to do is wait to see how you choose to end the fight.
The viable options here are evident:
• Kimura: It’s there, so why not just finish the move?
• Crucifix Position: All you would have to do is trap his free arm, which would open up the crucifix and virtually ending the fight.
• Sink the Hooks In: From here, releasing the hold and going for the back is an extremely easy transition.
There’s a lot to this move, that’s for sure. Check the video below starting at 8:20 to check it out!
-Dan Faggella