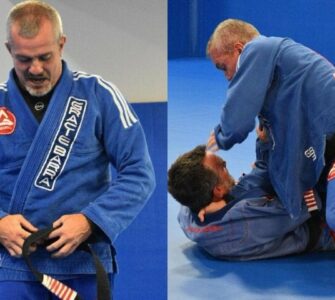
Guest post by Evolve MMA, Asia’s premier championship brand for martial arts. It has the most number of World Champions on the planet. Named as the #1 ranked martial arts organization in Asia by CNN, Yahoo! Sports, FOX Sports, Evolve MMA is the top rated BJJ gym in Singapore.
While it is always important to make sure your Brazilian Jiu-Jitsu (BJJ) isn’t dependant on whether or not your adversary is wearing a gi, if a practitioner ignores learning the numerous gi-based strangulation methods available to them it will not only hinder them in competition, it will stunt their growth as a martial artist.
Gi chokes can be attacked from almost every position imaginable, but the most powerful ones arise when you are either face-to-face with your opponent (like in the guard or mount positions), or when you have taken their back, so these are the areas we will focus on in this resource.
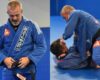
1) The Cross Collar Choke
There is an unfortunate occurrence in BJJ where practitioners will abandon the basic moves, the ones they are taught at the onset of their training, as they acquire more time in the sport. While it is always important to continue to expand one’s skill set, the majority of the techniques taught at the white belt level are by no means inadequate for higher belts to employ; in fact, some of them, such as the cross collar choke, are the most reliable in the entirety of BJJ, regardless of skill level.
Often called the “X Choke”, the cross collar choke is perhaps the simplest method of strangling an adversary who is wearing a garment, whether that be a gi in a sport situation or some sort of coat or shirt in a self-defense scenario. Another reason this technique is so valuable is that it can be applied from either the top (in the mount position) or on the bottom (in the guard position). While the mechanics are the same, we will be detailing the mount variation.
From the mount, take your right hand and grab your opponent’s right lapel, sliding your hand all the way up so it is as deep as you can get it. Ideally, you want your thumb next to the garment tag that is at the back of their collar. Then, take your left hand and slide it under your right forearm, grabbing your opponent’s left lapel identical to how you did on their right. Both of your palms should be facing upwards.
To finish the choke, curl your wrists so the blades of your wrists seal off your opponent’s arteries, as you pull your head to the side of your first grip: in this scenario, you would place your head on the mat on the left side of your opponent’s head, as you grabbed with your right hand first.
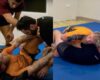
2) The Loop Choke
When those from a predominately no-gi grappling background make the transition to gi BJJ, one of the biggest hindrances to their adjustment is the depreciated effectiveness of the guillotine choke. While the guillotine can be used in the gi, it is nowhere near as powerful as it is without the garment. Fortunately, the loop choke offers a viable alternative that fulfills the absence of the guillotine when grappling with the gi.
For example, if you are playing half guard (with your right leg hooking your opponent’s right leg), and your opponent is attempting to crush your legs together and walk around your guard, you can use the loop choke as an effective counter, just as you would the guillotine in a no-gi situation.
As your opponent ducks their head, slide your left hand under their chin and grab their collar. While with the cross collar choke we want to grab as deep as possible, this is not the case with the loop choke: instead, you want to grab almost at the exact side of their neck. If your opponent continues to drive their head low, shoot your right hand over the back of their head and under your left elbow, so your left forearm is now forming a “loop” around their neck.
To finish, continue to hip out onto your right hip as you use your right arm to lift your left elbow skyward, tightening the strangle. And just like with a guillotine, if your opponent continues to walk to your right side, they will actually be tightening the choke!
3) The Bow and Arrow Choke
While our first two gi chokes arise in situations where you are face to face with your opponents, such as when in the mount or guard positions, our final one, the bow and arrow choke, will be employed when you are behind your opponent. While it can be set up with a particularly intricate entry from the turtle position, we will be focussing on how to set up the bow and arrow choke from the back position, which is a much more common and reliable method of attacking the strangle.
Once you have taken your opponent’s back and decided you would like to pursue a match-ending submission, you can initiate the bow and arrow choke by reaching your top hand (in this case, let’s say your right hand) across your opponent’s neck and grabbing their left lapel. While there are a plethora of gi chokes you could pursue that involve grabbing the other lapel, the substantial power bow and arrow choke is too lucrative an option to bypass.
Once the collar grip is established, your other hand will reach down and grab your opponent’s pant leg on the same side as your collar grip. So, if your right hand is grabbing your opponent’s left lapel, you will reach down and grab their left pant leg with your left hand. Using the pant grip, pull yourself perpendicular to your opponent. This will cause your right forearm to drive across their neck, sealing off their carotid arteries and forcing them to submit.
By no means are these three gi chokes the only ones worth practicing, but they are by far some of the highest percentage ones available. Becoming proficient in them should be a top priority for any BJJ practitioner who wants to excel in the intricacies of gi grappling.